Sensor Configuration
System Overview
The local device configuration can be accessed from a device in the same network (LAN) using a web browser. Open the url http://qssensor.local.
Cannot find http://qssensor.local?
Your device will be accessible using a computer at http://qssensor.local only if your router allows mDNS broadcasting. If mDNS broadcasting is disabled, you need to log into your router or use a tool such as nmap to find the local IP address of your sensor.
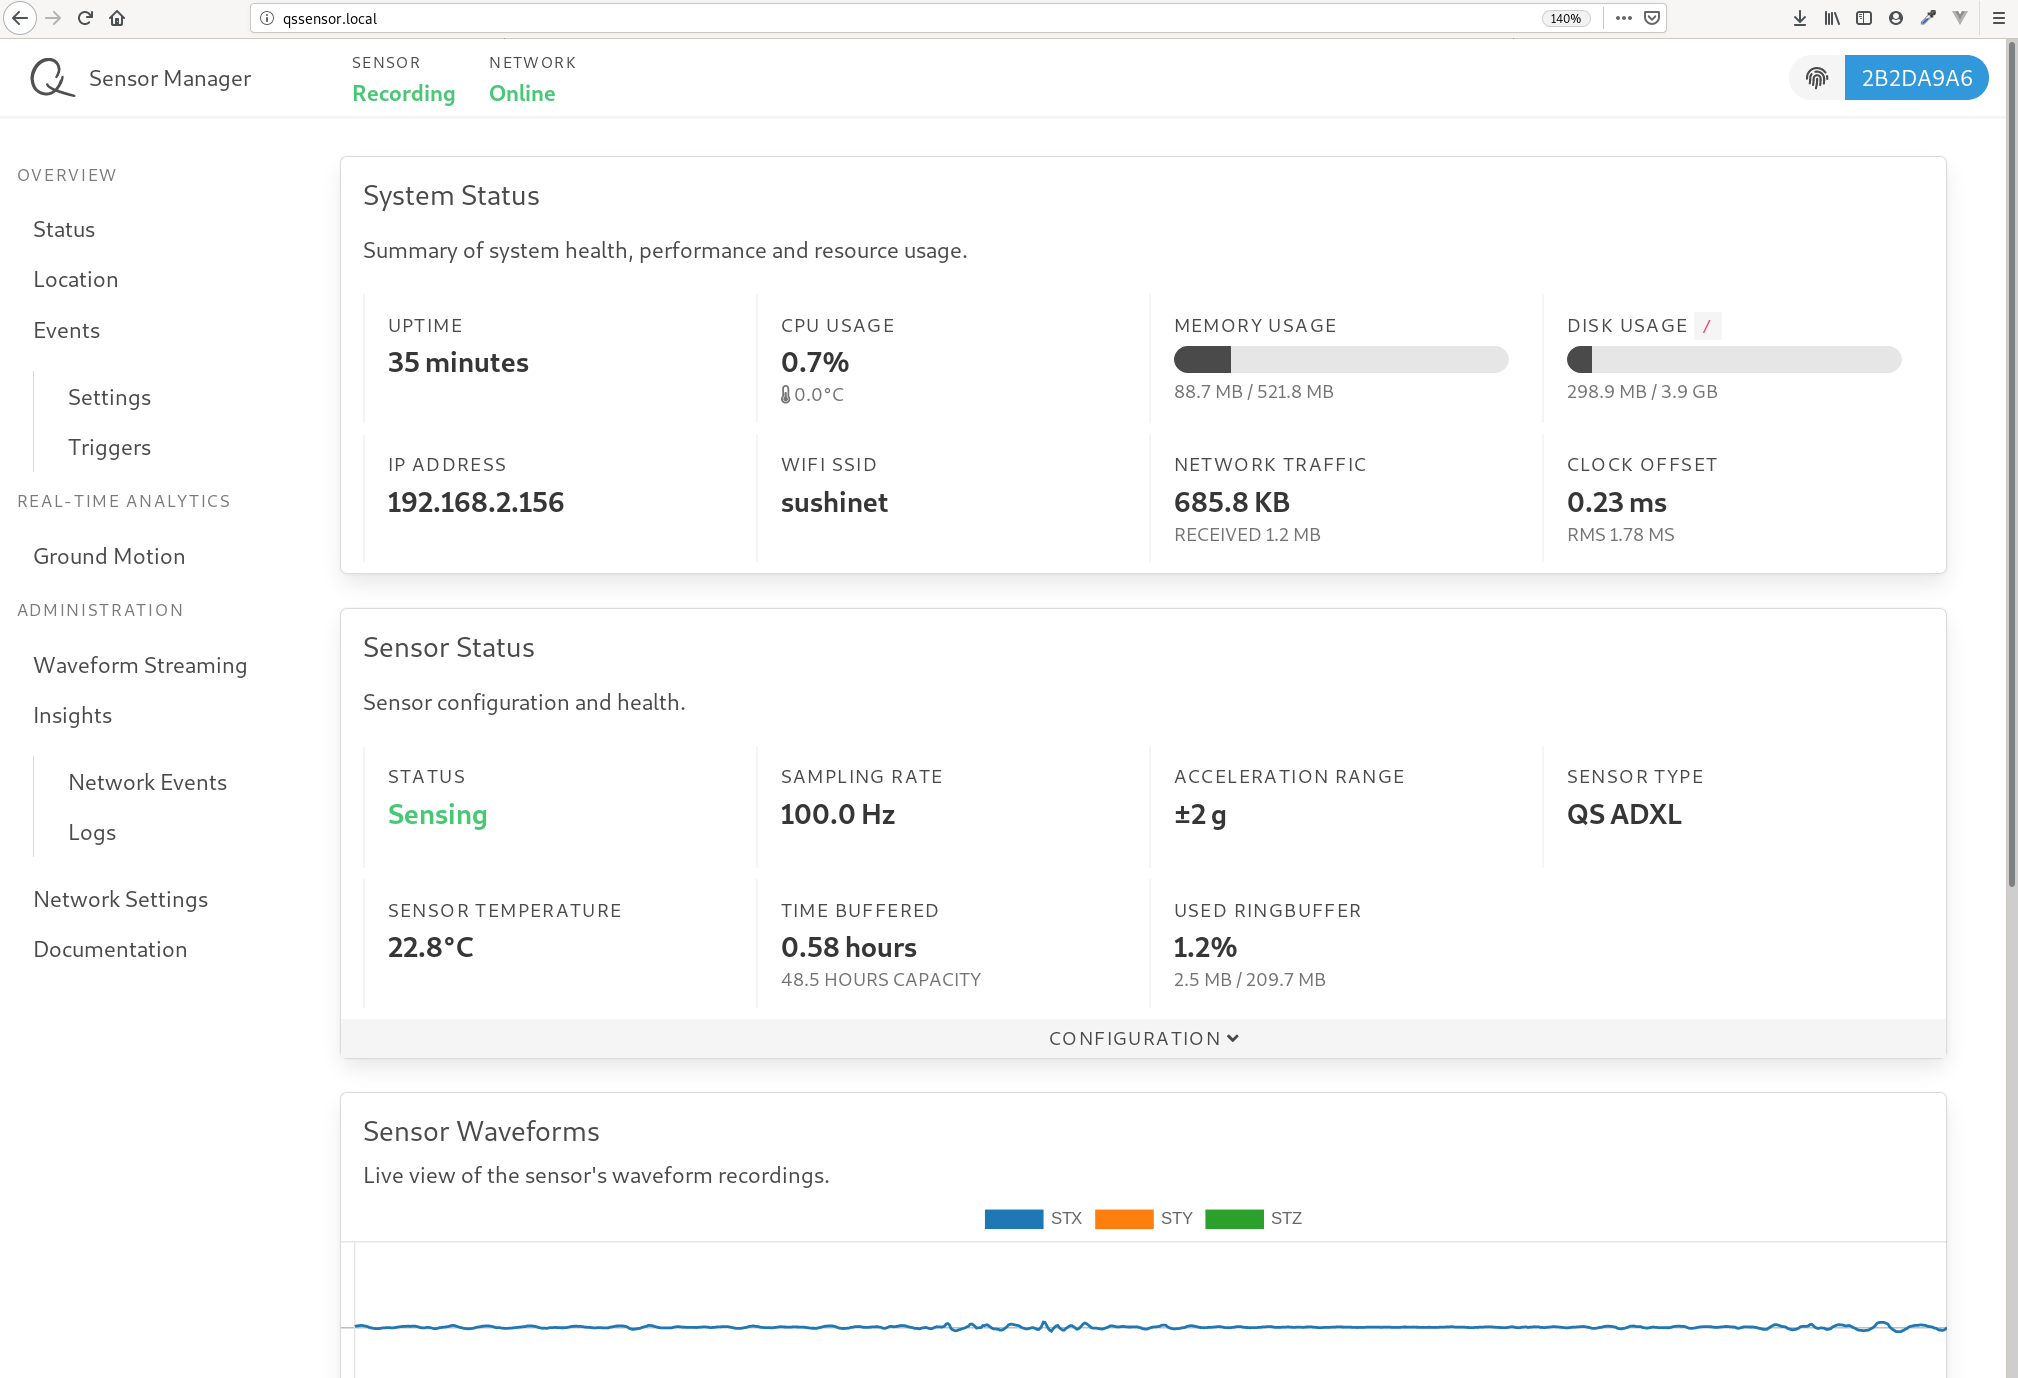
You should now see the local sensor configuration page providing you with a basic system overview.
TIP
Each configurable panel has a CONFIGURATION bar. You can click that bar to unfold a configuration menu.
Location settings
Open the Location tab.
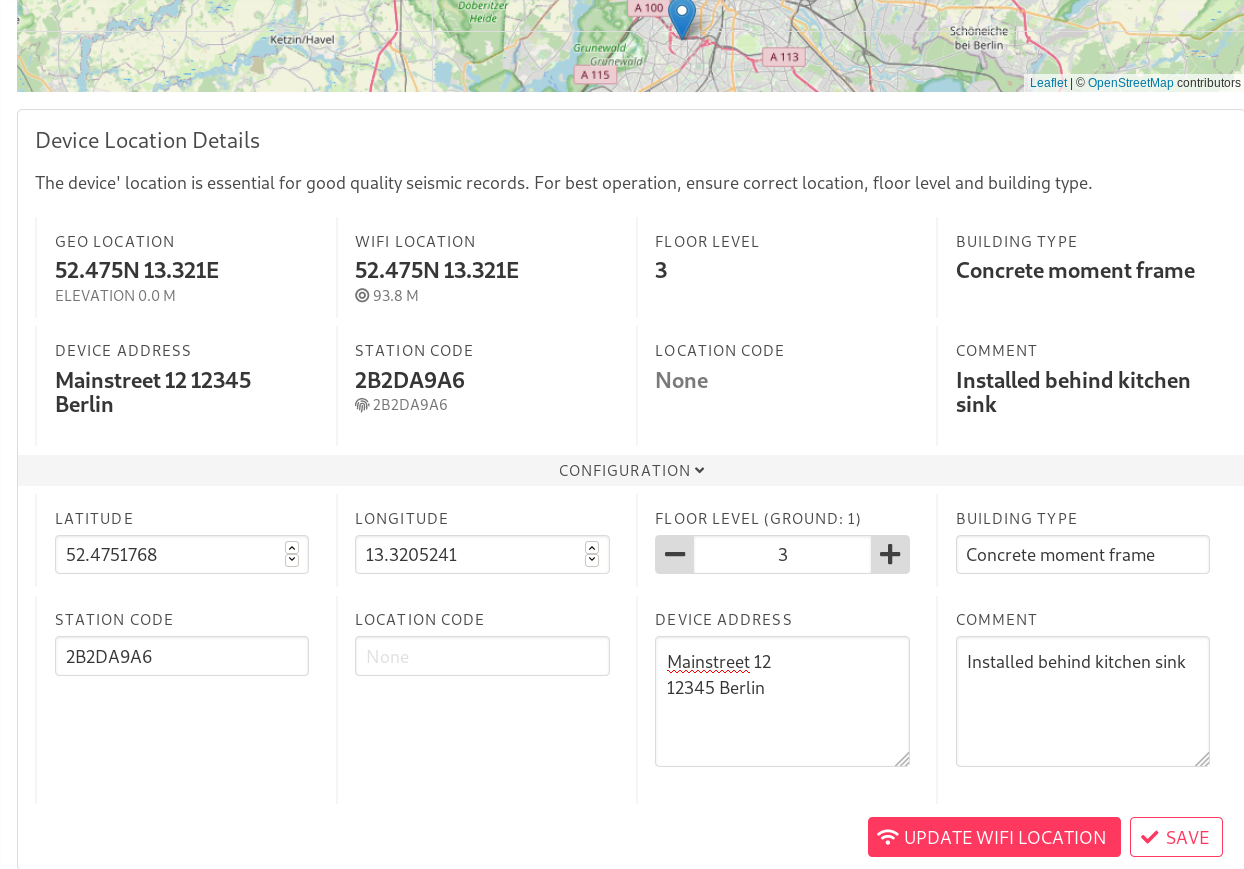
Unfold the CONFIGURATION menu and set the location either by dragging and dropping the location pin on the map or by setting the exact location in the menu. Additional meta information such as address, floor level and building type will be helpful for later data analysis. You can also find the STATION CODE in this panel which can be used to e.g. retrieve waveform data from your device.
Event Triggers
Find the Events menu, open the Triggers settings and unfold the CONFIGURATION menu. Set a threshold when your device should trigger and run its analysis plugins.
You can enable, disable and configure waveform analysis plugins under Settings. The results of each plugin are grouped into an event report which will be transmitted to the backend and made available for download and further offline processing.
System Reboot
If you want to reboot your sensor open the INSIGHTS panel and hit the REBOOT button.
Backend Connection
The sensor connects to the SeismiQ backend using your account credentials — the same email address and password you use to log in at network.quakesaver.net. A separate access token is no longer required.
Open the Network settings and unfold the CONFIGURATION menu of the QuakeSaver Network Connection panel. Enter your email and password in the fields highlighted by the blue rectangle, leave the PROVIDER set to QuakeSaver Management, and click Save Settings.
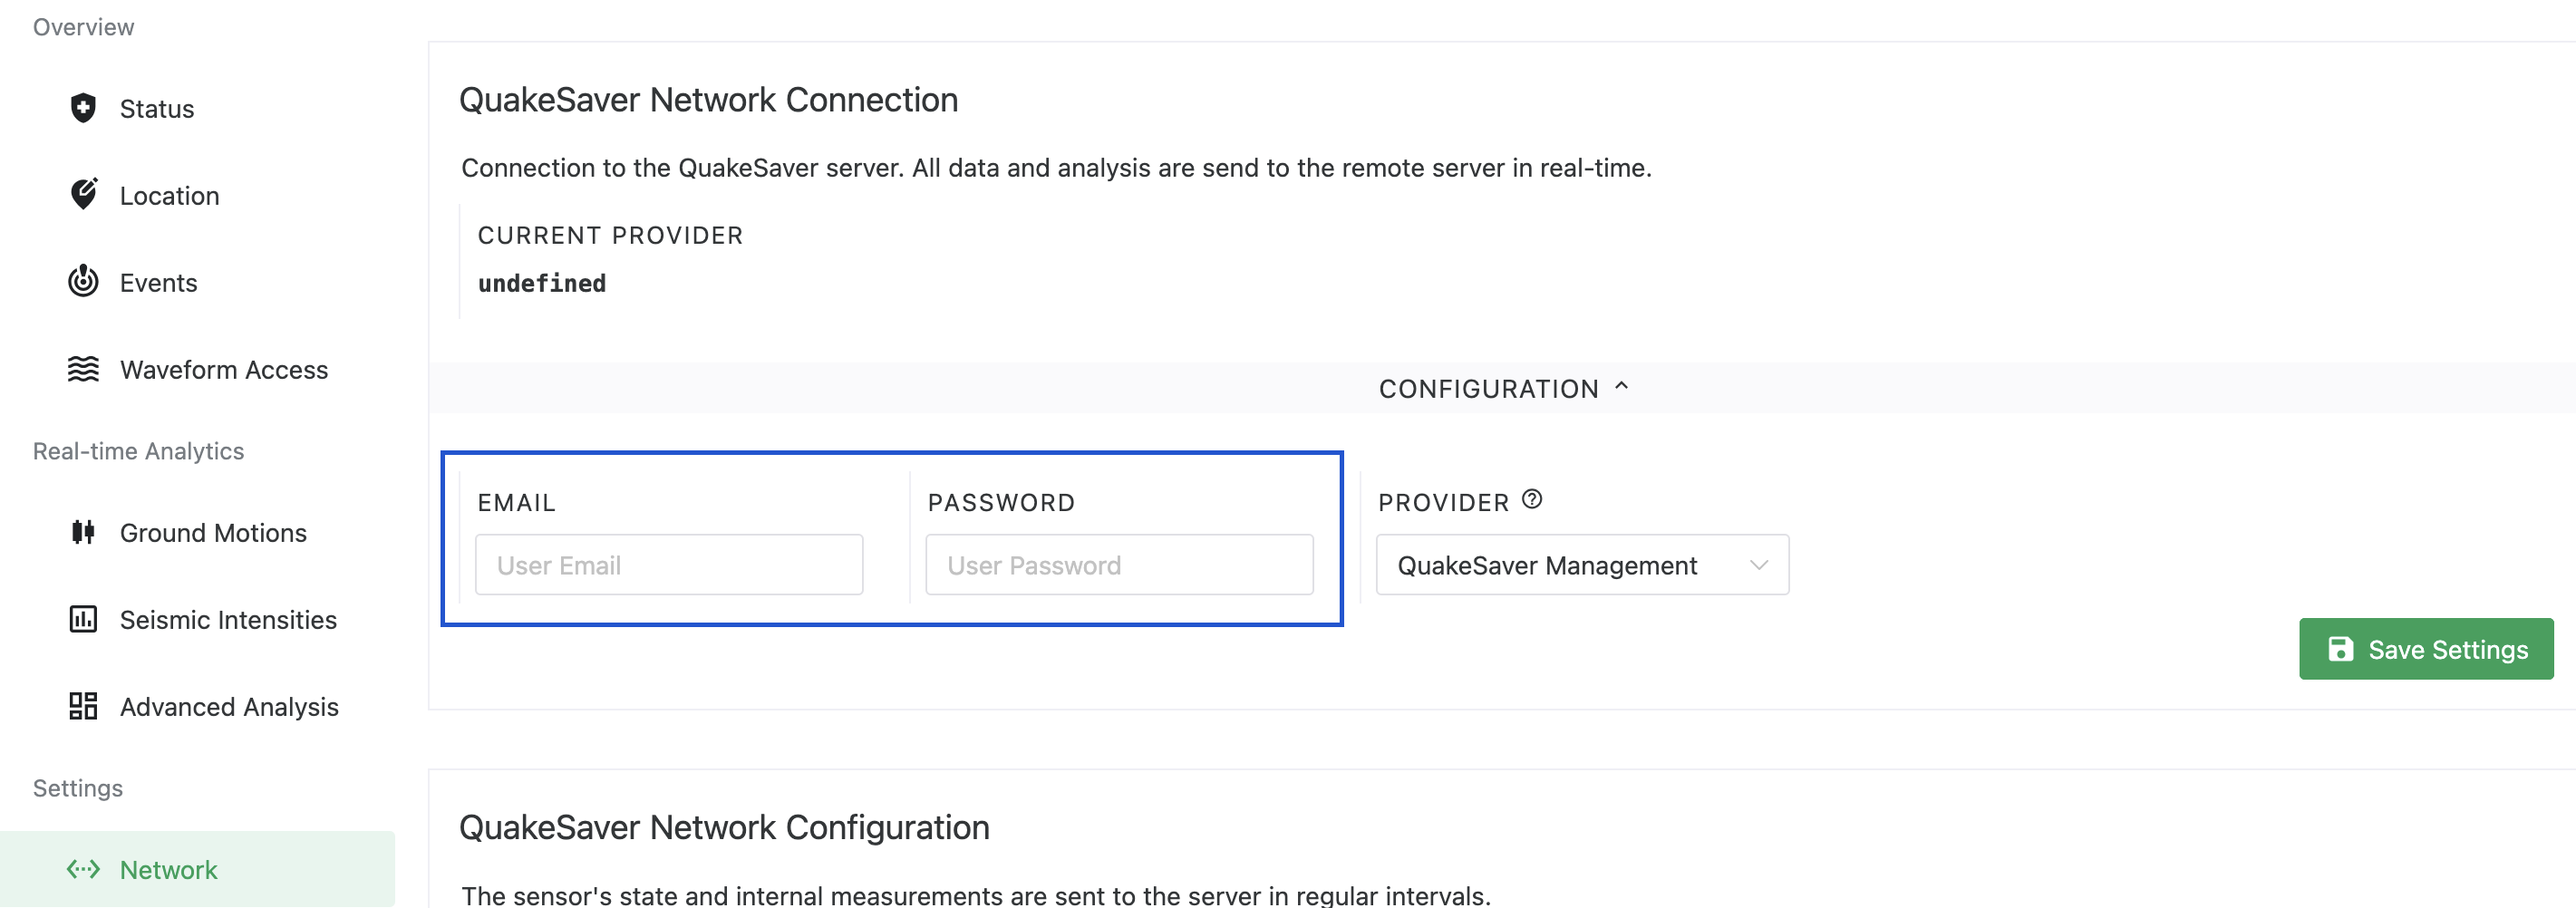
The sensor will now authenticate against the backend and be assigned to your personal sensor collection.